
Growing edible plants and flowers indoors lets you go beyond your climate’s limits and keep that fresh-from-the-garden vibe going all year. I find there’s something super satisfying about snipping herbs in the kitchen or harvesting a quick salad mix in the middle of winter when everything outside is frozen solid.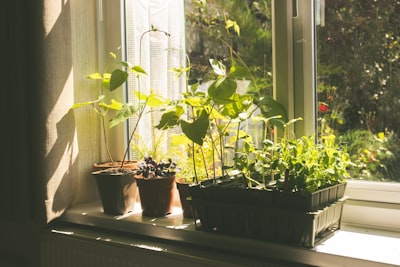
Extending the growing season indoors isn’t just about avoiding bad weather; it’s about getting more control, more harvest, and, honestly, a whole lot more fun out of gardening. Here’s my take on how you can do it from start to finish, plus a few tips to help you start strong and enjoy fresh greens no matter the weather outside.
Why Grow Indoors to Extend the Season?
I started growing indoors mainly to get around my area’s short spring and quick-to-return fall frosts. Even with a cold frame or greenhouse, there’s only so much the weather will let you do.
Indoor growing makes it easy to start crops early, push them late into the year, or even get continual harvests no matter the season outside. It’s also a rewarding way to experiment with new varieties that may not thrive outdoors in your area. Plus, having fresh produce at your fingertips boosts your daily meals and encourages healthier eating habits.
Plants inside don’t have to deal with frost, scorching sun, or sudden cold snaps. You get to call the shots on temperature, light, and humidity. This means you can start seeds in late winter and transplant them outside when conditions are perfect, or keep things like basil and microgreens going steady through the cold months. It’s pretty handy for folks craving year-round access to fresh herbs and greens, or for those who want to experiment with crops that might not typically survive outside in their area. And don’t forget, growing indoors can be a calming and enjoyable hobby, especially when the weather outside isn’t cooperating.
Choosing the Right Plants
Some crops perform way better indoors than others. I stick with plants that fit small spaces and adapt well to pots and containers. Here are a few types worth checking out:
- Cool-season greens: Lettuce, spinach, arugula, and kale do well indoors and can grow quickly without blazing sun. They’re perfect for salads and sandwiches and provide a steady, easy harvest.
- Fruiting plants (compact varieties): Dwarf tomatoes, mini bell peppers, compact chili varieties, and even small strawberries can produce in containers under lights. Go for varieties like ‘Tiny Tim’ tomato or ‘Mini Bell’ pepper for reliable yields.
- Herbs: Classics like basil, parsley, cilantro, thyme, and mint grow happily indoors. Fresh herbs in winter are a real treat for any kitchen, adding heaps of flavor to your dishes and drinks.
- Microgreens and sprouts: These little guys give you a fresh harvest within a couple of weeks. Super easy and rewarding, microgreens are packed with nutrients and are perfect for topping salads, sandwiches, or soups.
When I’m shopping for seeds, I look for varieties labeled “container-friendly” or “compact.” These are bred specifically for small indoor spaces. Choosing the right plants can really boost your odds of success indoors. Also, consider trying unusual or “next-level cool” edible flowers like nasturtiums or violets—these can grow indoors too and brighten up any dish.
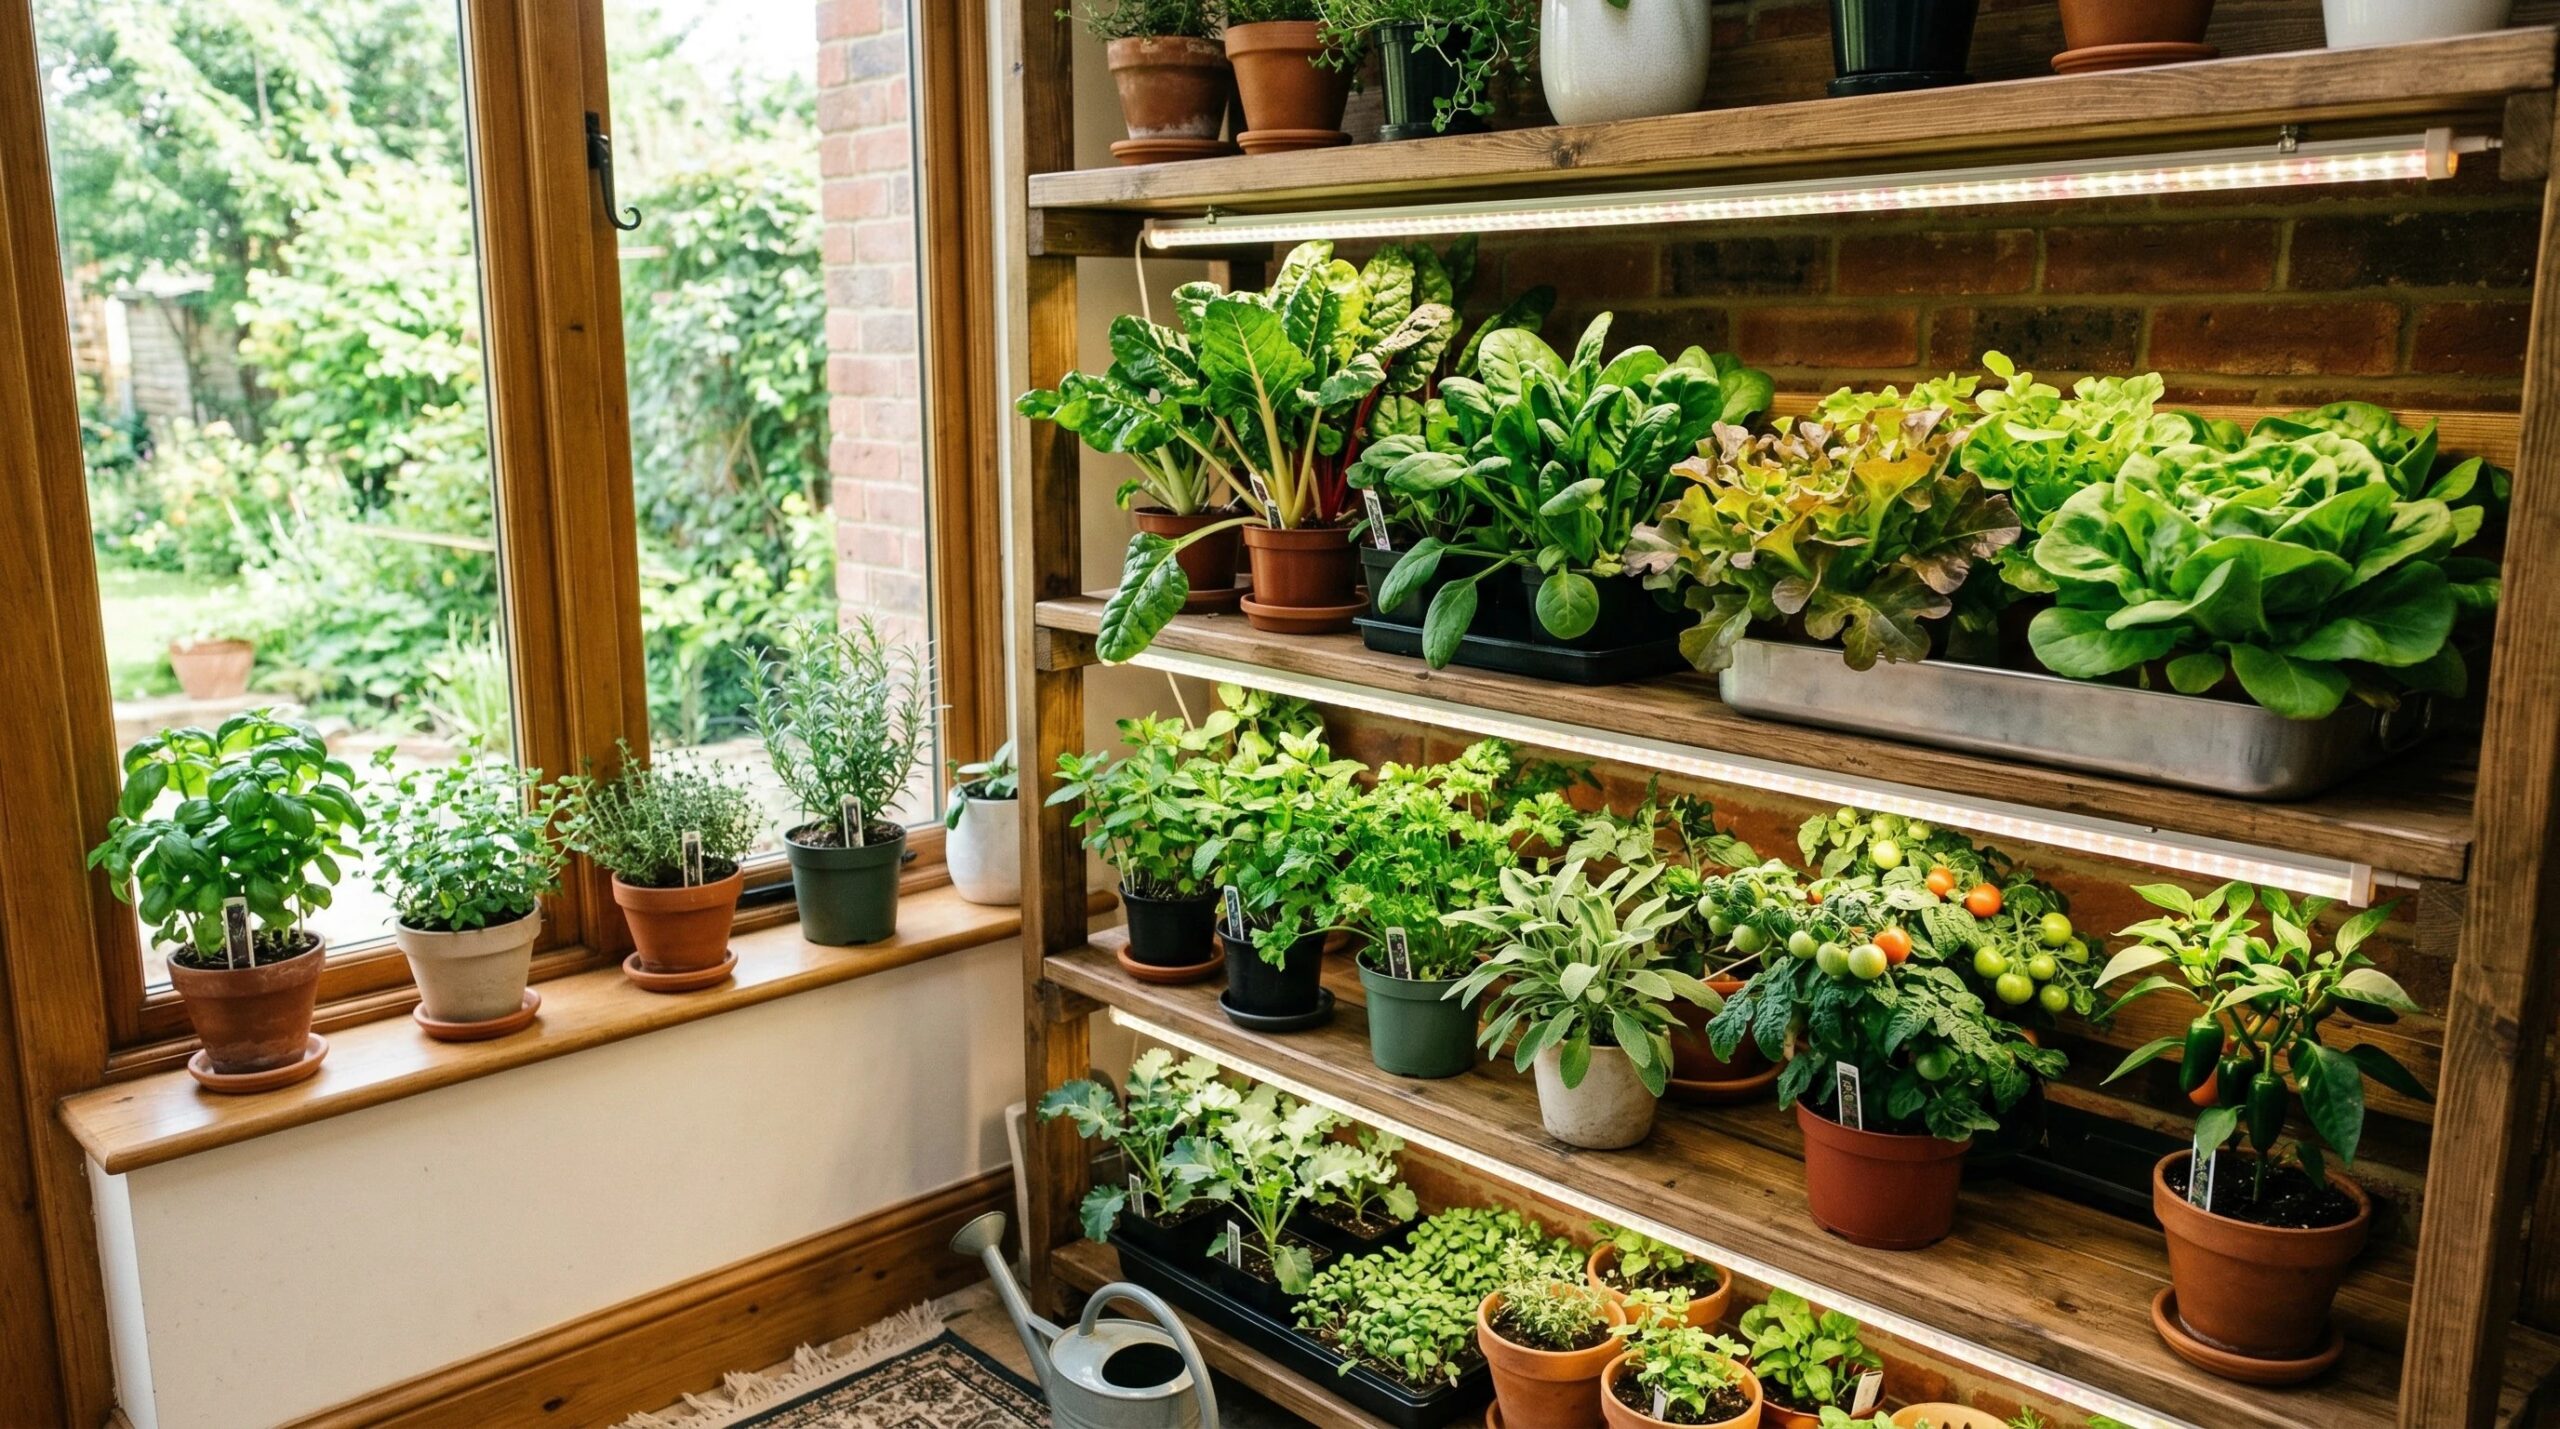
Lighting Solutions
Light makes or breaks most indoor gardens. Most homes don’t pull in enough daylight in winter, and not every window faces the right direction. Plants grow best with about 12 to 16 hours of good light per day indoors. Here’s what you want to know about lighting options:
- Window light: South-facing windows are your best bet, but even then, stronger crops might not get enough light for fruiting. North-facing windows rarely provide enough light except for shade-loving greens and very hardy herbs.
- LED grow lights: These have become my favorite because they’re energy-efficient, run cool, and last for years. Most LEDs offer full-spectrum coverage for balanced growth and are adjustable for different plant stages. They’re getting cheaper these days, and you can pick up a reliable panel for under $50.
- Fluorescent lighting: T5 or CFL bulbs work well for seedlings and leafy greens. They’re affordable and readily available, and a tried-and-true choice if you’re starting.
- Full-spectrum lights: Mimic natural sunlight and help ensure plants get what they need at every stage. Look for units that balance red and blue wavelengths for the leafy phase and fruit development.
I use a plugin timer to handle on/off cycles, making it easy to stick to a consistent “day length” for my plants, especially during short winter days. Remember to keep your lights within a foot or so above your plants and raise them as the plants grow. Adjusting the light height prevents spindly, leggy stems and ensures even, healthy growth.
Temperature and Climate Control
Most indoor plants like it around 60–75°F (16–24°C). Too cold and they’ll sulk; too warm and they’ll get stressed or leggy. Avoid placing your indoor garden right next to cold windows or above a heating vent, where temperatures can swing quickly. Even a small overnight temperature swing can slow growth, so keep things steady whenever you can.
When I start seeds, I often use seedling heat mats to warm the soil gently. This helps with sprouting, especially if my room is cooler than 70°F. I also keep a simple thermometer nearby to check temps—digital ones with humidity readings are extra useful. If a specific crop likes it warmer (like peppers or tomatoes), consider a small space heater or relocate those pots to a toastier spot. Sometimes, moving pots just a few feet from a cold window makes a huge difference. Maintaining the optimum climate not only improves growth but also helps prevent disease.
Humidity and Air Circulation
Winter homes can get dry enough to make even people’s hands crack, let alone stress out plants. Low humidity isn’t ideal for most indoor crops. I maintain humidity using a few easy tricks:
- Group plants close together to create a microclimate. The more leaves, the more moisture gets trapped in the immediate area.
- Set pots on trays filled with water and pebbles for a cheap humidity boost. Just make sure the pots are sitting above the water, not in it, to avoid root rot.
- Run a small humidifier, especially in rooms with forced air heat. If you have a lot of tropical crops (like certain herbs or mini peppers), a humidifier can make a noticeable difference.
Good airflow matters too. A basic oscillating fan helps prevent fungal diseases and keeps leaves strong by mimicking outdoor breezes. I’ve found that even occasional gentle drafts help, so don’t be afraid to move the air around (avoid freezing drafts from open windows in winter). Aim for air movement that gently wiggles the leaves. This prevents mold, strengthens stems, and can deter pests.
Soil, Containers, and Growing Media
I never use plain garden soil indoors because there’s too much risk of bugs or pathogens hitching a ride. Potting mixes are way better for drainage and root health. Here’s what’s worked for me:
- Use high-quality sterile potting mixes for healthy root systems. These mixes are light, drain well, and help roots breathe.
- Choose containers with drainage holes so roots won’t sit in soggy soil. Root rot is the biggest killer indoors!
- Pick pot sizes that fit your plants. Bigger isn’t always better because oversized pots stay wet longer and can lead to issues. Choose the minimum size you need for each plant’s expected root mass.
- Lightweight pots with built-in saucers are practical if you plan to move things around or use shelving setups. Plastic and resin pots are easy to shift and manage.
- Try alternative growing systems like coco coir, soilless mixes, or get into hydroponics for an even cleaner setup (and often faster growth). Hydroponic setups minimize soil mess and often let you harvest greens and herbs more quickly than traditional planting.
You can even mix in some variety with recycled containers such as yogurt cups or tin cans (make sure they have drainage holes). Experimenting with different media also helps you spot what your plants like best.
Watering and Nutrient Management
It’s super easy to overwater houseplants compared to outdoor beds. Inside, evaporation happens more slowly, and containers hold water longer. I stick to the “finger test”: poke a finger into the soil an inch down; if it’s dry, it’s probably time to water. For plants in small or shallow pots, check moisture every other day.
Most indoor crops need less water but still require regular nutrient applications. I use liquid fertilizers mixed at half strength every couple of weeks, adjusting as plants grow or when they start fruiting. Slow-release pellets are convenient for lazy days. Watch for signs of hungry plants—yellowing leaves can mean they need more food.
Some plants, such as microgreens or lettuces, might appreciate a diluted fish emulsion or an organic feed. Rotate the type of fertilizer you use to give a broad range of nutrients, and flush pots with plain water now and then to prevent mineral buildup.
Starting Seeds Indoors
This is my favorite hack for getting a jump on the season. Seed trays, soil blocks, and small starter pots all work well. I keep trays under lights with gentle warmth until the seeds sprout. Label each pot or tray to keep your varieties straight.
For crops that will move outdoors later (like tomatoes or peppers), starting seeds indoors buys you four to eight extra weeks. Be sure to “harden off” seedlings by gradually exposing them to outdoor conditions for a week or so before transplanting to the garden, so they don’t go into shock. Start with a few hours on a sheltered porch, then build up exposure until they’re acclimated.
Try mixing in some fast-growing indoor-only crops like mustard greens or cress — they sprout quickly and stay compact, giving you quick rewards while you wait for the bigger stuff to mature.
Indoor Growing Systems
I got tired of plants crowding my windowsills, so I tried shelf setups with cheap utility shelves and adjustable grow lights strapped on top. Suddenly, I could grow three times as much greens in the same space. If you’re tight on space, vertical systems pay off fast.
- Multitiered shelving with individual grow lights lets you grow six or more flats of greens in just a few square feet—setting up your own salad bar at home.
- Hydroponic kits (like Kratky jars or ready-made towers) speed up growth and can save water. No soil mess, either. Just keep an eye on nutrient levels and water quality; hydroponic tomatoes and greens thrive with minimal fuss.
- Windowsill gardens are perfect for herbs or microgreens. Even a small kitchen can host a steady supply of greens in recycled jars or compact planters.
- Grow tents and mini indoor greenhouses with zippered covers let you control temperature, humidity, and light for finicky crops. These are perfect if you want to try rare plants or test more challenging fruiting varieties.
Get creative when setting up your space. Stack shelves, hang pots from the ceiling, or use magnetic or suction cup planters on windows for extra growing room. Each tweak to your growing system can make it easier to harvest more in less space.
Pest and Disease Management
Indoor gardens see their share of bugs, too. The first time I had a spider mite invasion, it caught me totally off guard. It pays to check plants regularly, so you can nip problems in the bud— a quick once-over every few days makes a huge difference.
- Common culprits include aphids, spider mites, and fungus gnats. Look under leaves and around the base of pots for clues such as webbing or sticky residue.
- Keep things clean; remove fallen leaves, old stems, and don’t bring in outdoor plants unless you’ve inspected them. Wipe down pots and trays to minimize the spread of problems.
- Neem oil or insecticidal soap works for most minor outbreaks. Apply it with a spray bottle, following the label directions, and be sure to coat the undersides of leaves.
- If a plant gets totally infested, it’s best to isolate it from your main group while you treat it, or compost it if things get out of hand.
To help prevent disease, avoid splashing water on leaves, provide good airflow, and let the top layer of soil dry out between waterings. Keeping humidity moderate and not letting plants get crowded also limits problems. It’s far easier to stop an outbreak early than to clean up after a larger infestation gets going.
Succession Planting for Continuous Harvest
The best way to always have something fresh is to stagger plantings. I’ll plant a small tray of lettuce or microgreens every two or three weeks. This rhythm gives me a steady harvest instead of one huge glut that’s tough to use up.
Indoor space fills up quickly, so I rotate crops; when spinach finishes, I might follow it with basil or another quick green. This way, no square inch sits empty for long. Keep a calendar or chart on hand for your sowing schedule—it helps pace out the work and avoids forgotten gaps in production.
Mix things up with different greens each round. Try spicy mustard one week, sweet lettuce the next, or toss in edible flowers for variety. By changing up what you plant, you use soil nutrients differently and interrupt pest cycles, making for a healthier, more productive indoor garden overall.
Energy Efficiency and Cost Considerations
Running grow lights, fans, and humidifiers adds a little bump to the electric bill. Choosing energy-efficient LED lights and using timers to turn off lights at night help cut costs. Power strips and smart plugs make it easier to control everything with just a tap on a button or in an app.
I measure success by how much I harvest versus how much I spend. Homegrown herbs or salad mixes can cost way less than store-bought equivalents, especially if you avoid wasting energy. If you’re running big setups, tracking costs is a good idea, but for most hobby indoor gardeners, it’s still better than buying bland winter veggies from the supermarket. Reuse containers, take cuttings to propagate new plants, and use leftover packaging as pot trays. All these little strategies keep your costs down while still giving you next-level cool harvests year-round.
Frequently Asked Questions
I get lots of questions about growing indoors. Here are a few that come up all the time:
How much light do indoor plants need? Most edible crops need 12–16 hours under a full-spectrum grow light for best results. If you’re using a window, make it south-facing and supplement as needed. Rotate plants to keep growth even.
Can I grow tomatoes and peppers indoors all year? Small-fruited and dwarf varieties will keep going under strong lights and in warm rooms. Regular-sized types can work, but yields are usually smaller indoors. Pick compact, container-friendly cultivars for best results and a more manageable indoor adventure.
What’s the easiest crop to grow inside? Microgreens and leafy greens are super forgiving, sprouting in as little as a week. Herbs like basil, mint, and chives work great in sunny windows or under basic LEDs.
How do I prevent bugs on my indoor plants? Keep new plants away from your indoor garden for a week or so, check leaves regularly, and treat problems early with neem oil or soap. Good airflow and clean pots help, too. Use sticky traps to monitor flying pests and always toss plants that seem beyond saving.
Is it possible to grow root veggies indoors? Absolutely—try fast-growing radishes, baby carrots, or green onions in deeper pots. They don’t take much space and are pretty eye-catching when you pull them up fresh.
Final Thoughts
Indoor gardening isn’t just a winter project. With the right setup, good lights, smart plant choices, and attention to water and humidity, you can keep your harvest going long after outdoor beds are done. Plus, there’s no beating the taste of greens and herbs picked minutes before you eat them. Growing indoors is a fun way to keep your green thumb busy and your meals fresh all through the year.
Whether you start with a handful of pots or go all-in with stacked shelves and hydroponics, the extra effort pays off every time you snip something fresh for your plate. Time to roll—why not start your own indoor growing adventure?